 Project 6
Project 6: Animated Scene
The purpose of this project is to give you experience with both top-down design and efficient coding practices that take advantage of things with similar structures.
Tasks
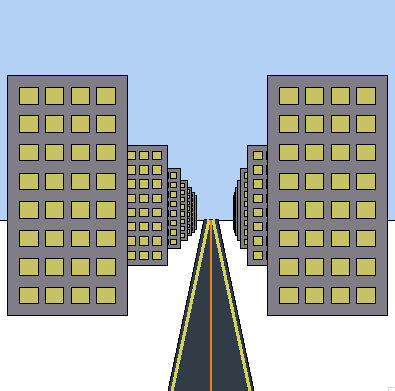
The result of this assignment will be similar to project 3. You'll create a scene that is a collection of complex objects. The complex objects will all be collections of Zelle graphics primitives and have the same organization as the spaceship you created in lab. Each complex object will have a function that initializes it and any complex object that changes will have a function that animates it.
The big difference from project 3 is that your scene can be animated, with objects moving or changing colors.
-
Think about a scene you want to create. Design the scene on paper as
a collection of complex objects like buildings, streets, stoplights,
and cars. Keep it simple. Come up with at least 2 complex objects of
your own that you want to create for your scene. At least one of them
will need to animate in some way. Animation can involve motion or
changing color.
For each of the complex objects, create a new init function in complex_shape.py. For the spaceship we created spaceship_init. Follow the same convention for your other complex objects. For a stoplight, for example, create stoplight_init.
The init function should always take an x, y, and scale, which you should use just as in project 3 so that the object can be placed anywhere at any scale. The init function should return a list of the primitive objects that make up the complex object, just like we did with the spaceship_init function.
If your complex object should animate, create an animation function for the complex object. Use the same naming scheme, putting a _animate after the object's name. We created spaceship_animate for the spaceship plant. You would create stoplight_animate for a stoplight.
You need to animate at least one of your new complex objects, even if it means just changing colors. The animate function should take in at least three parameters: the list of objects in the shape, the frame number, and the window, just like our spaceship_animate function. You can give the animate function any number of other parameters necessary for it to work properly. For example, you may want to include the scale used to create the image, so that movement can scale with the size of the shape.
For each complex object you create, make a test function in complex_shape.py, just like we did with test_spaceship. The test function should create a window, create multiple versions of the complex object, and then wait for a mouse click to quit. If your animate function does something interesting, test that out as well.
Include a small picture for each complex object in your writeup.
-
Make a file scene.py and import your complex_shape package, the graphics
package, and the time package. This file should have at least a main
function (you can create other functions as you see fit to organize the
code).
The main function should initialize the complex objects in the scene and draw them. It should then execute a loop and animate the complex objects that change (i.e. the ones with animate functions). It will be similar to the lab6test.py main function from lab. Note that in lab6test.py, we put the spaceship complex objects in a list. You may want to use lists if you have multiple copies of the same object. But if you have one copy of each type of object, then you may want one variable for each object. The important thing is to make your code both succinct and readable.
Do something creative within this framework.
Include several pictures of your scene animating in your writeup.
Alternatively, you can create an animated gif to post (this is preferred but not required).
Note, you can use the time.sleep() function to make your animation slow enough that you can do a screen capture on each frame. If you do that, then you can create an animated gif using the following command in Terminal inside the directory where your screen shots are saved.
convert -delay 60 *.png myanimation.gif
The file myanimation.gif will be an animated gif that you can put on a web page.
In lab6test.py is also another way to save your screen using postscript files. To do that, see the notes at the bottom of this page.
You can also create movies of your screen using the Quicktime Player application.
Extensions
- Make additional complex objects beyond the required 2, or animate more objects than the required one.
- Set up a system that creates a scene out of complex objects based on a list that gives the name, location, and scale of each complex object in the scene.
- Make an animation with multiple sequential events that make a coherent story.
- Make the trailer for your favorite action movie.
Writeup and Hand-in
Turn in your code by putting it into your Private handin directory on the Courses server. All files should be organized in a folder titled "project6" and you should include only those files necessary to run the program. We will grade all files turned in, so please do not turn in old, non-working, versions of files.
Make a new wiki page for your assignment. Put the label cs151f17project6 in the label field on the bottom of the page. But give the page a meaningful title (e.g. Stephanie's project 6).
Your writeup should follow the outline below.
-
A brief summary of the task, in your own words. This
should be no more than a few sentences. Give the reader (a
peer not in the course) context and identify the key
purpose of the assignment. You can assume your reader has
read through your prior assignments.
Writing an effective summary, or abstract, is an important skill. When you are writing yours, consider the following questions.
- Does it describe the CS purpose of the project (e.g. writing well-organized and efficient code)?
- Does it describe the specific project application (e.g. making pictures of space stuff)?
- Does it describe your the solution or how it was developed (e.g. what were you trying to draw and how)?
- Does it describe the results or outputs (e.g. did it turn out reasonably well)?
- Is it concise?
- Are all of the terms well-defined?
- Does it read logically and in the proper order?
- A description of your solution to the tasks, including any images you created. This should be a description of the form and functionality of your final code. Note any unique computational solutions you developed. If you include code snippets, they should be small segments of code--usually one or two lines and normally much less than a whole function--that demonstrate a particular concept. If you find yourself including more than 5-10 lines of code, it's probably not a snippet.
- A description of any extensions you undertook, including images demonstrating those extensions. If you added any modules, functions or designed any other complex shapes, note their structure and the algorithms you used.
- A brief description (1-3 sentences) of what you learned.
- A list of people you worked with, including TAs, and professors. Include in that list anyone whose code you may have seen, such as those of friends who have taken the course in a previous semester.
- Don't forget to label your writeup so that it is easy for others to find. For this lab, use cs151f17project6
Making a GIF from PS files
In order to make a GIF from PS files created using the saveFrame function, you need to first convert the PS files to PNGs in a way that removes the alpha channel and sets the background color to white. You can do that using the following python file.
If you have a set of .ps files in your directory, you can run it using the following.
python ps2png.py *.ps
This will create a whole bunch of png files, one for each ps file. Then you can make your animated gif using the command:
convert *.png -delay 30 myanimation.gif
Note that if your files are numbered in such a way that typing ls does not list them in order, then you will need to re-number them. You can do that by creating filenames using the following code.
filename = "frame%03d.ps" % (frame_num)