 Project 10
Project 10: Non-Photorealistic Rendering
For the project, you'll need to implement two more styles of drawing. To implement a new style, you just need to add another case to the if statement in the forward method of the Interpreter class.
The last step in the project is to enhance your scene from the last project by making use of the various styles you implement this week. You should be able to run the scene with different styles with minimal changes to your code.
Tasks
- Implement jittered drawing with three randomized line segments
Implement a style 'jitter3' that draws the line segment as three, criss-crossing jittered lines. The implementation is similar to the 'jitter' case, but instead of drawing one line, you draw three. All three lines should begin at a point that is a short, random distance from the turtle's initial position and end at at a point that is a short, random distance from the desired end point.
The jitter3 will involve several goto statements, e.g.
    jx = random.gauss(0,self.jitterSigma)
    jy = random.gauss(0,self.jitterSigma)
    turtle.goto( x0+jx, y0+jy )
For each goto statement, the jx and jy values should be regenerated from a Gaussian distribution (random.gauss) with a zero mean and jitterSigma as the standard deviation. They should not all be the same offsets. - Created a 'dotted' style
Create a 'dotted' style that draws a series of circles separated by spaces. The circles do not need to be in a straight line or all be the same size.
Create a field in the TurtleInterpreter to hold the dotSize (the suggested radius for the circles). Then write a setDotSize method in the TurtleInterpreter class and a setDotSize method and associated dotSize field in the Shape class, similar to the setStyle and setJitter methods in both classes.
- Make an image showing the different line styles
Create a python file demo_line_styles.py that draws multiple copies of one of your shapes from last week. Show the shape drawn in 'normal', 'jitter', and 'jitter3', and 'dotted' styles. For the normal style, draw shapes with at least 2 different line widths. For jitter and jitter3 styles, draw shapes with at least 2 different jitter sigmas. For the dotted style, draw shapes with at least 2 different dot sizes. Emphasize the differences.
An image demonstrated your different styles is required image 1.
- Make an NPR version of your outdoor scene
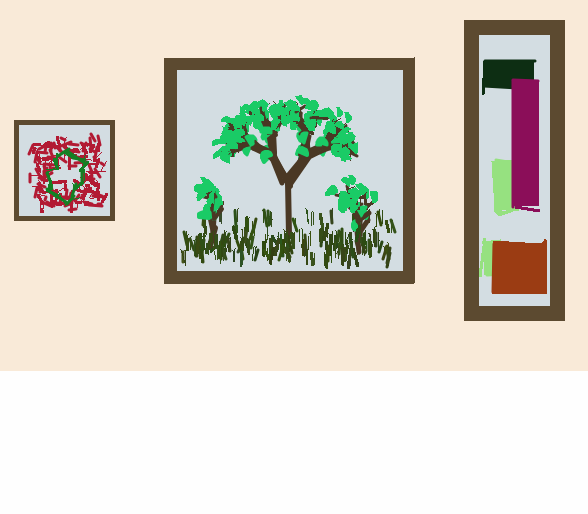
Recreate your scene from last week--or create a brand new scene--using a new file npr_scene.py. Edit your scene so that it makes use of the different drawing styles. Feel free to enhance it, but focus on enhancements that make use of the different drawing styles and shape classes you've created. When you are done, you should have something that looks a bit more like a real painting or drawing.
The updated outdoor scene is required image 2.
- Create your own parameterized stochastic L-system
Make your own new parameterized stochastic multi-rule L-system. You can create a variation on one of the given files or look in ABOP for inspiration. If you create a variation, you need to do more than just add ornaments (berries or leaves). You need to make the shape structurally different so the difference is obvious.
Your new L-system does not have to be a tree, but it does need to include branching, multiple rules, and at least one rule with more than one replacement string. Describe the L-system you designed in your writeup and explain your design choices. Make a scene or image that includes your L-system.
A picture of the new L-system is required image 3.
Follow-up Questions
- What is non-photorealistic rendering?
- What does it mean to parameterize a symbol in an L-system?
- What does stochastic mean?
- Who is your favorite visual artist?
Extensions
Extensions are your opportunity to customize your project, learn something else of interest to you, and improve your grade. The following are some suggested extensions, but you are free to choose your own. Be sure to describe any extensions you complete in your report. Include pictures.
- Create more L-systems. Show how they differ in their design.
- Add other drawing styles. For example, try making one that simulates a brush by drawing many approximately parallel lines. Slight variations in color between the different lines makes the effect better. You might also try a pen-and-ink style with cross-hatching or just a series of straight lines at an angle to the direction of the actual line. Note although you are welcome to implement dashed and broken styles, they will not be counted as extensions.
- Modify drawString so that when drawing a tree the branches droop down like gravity is pulling at them. This involves determining the turtle's current angle. If the current heading is in the first or fourth quadrant, then gravity will make a right turn angle larger. If the current heading is in second or third quadrant, then gravity will make a right turn angle smaller.
- Create a sequence of images to build an animation.
- Make more shape classes that do interesting things. Making a fixed sequence of characters is easy. Make a shape class where the strings are the result of executing a function. L-systems are one example of a dynamically created string, but there are many other ways to do that.
- Be more creative with your main code. In other words, use programming structures, user input, and code to go beyond the minimal required image.
Submit your code
Turn in your code (all files ending with .py) by putting it in a directory in the Courses server. On the Courses server, you should have access to a directory called CS151, and within that, a directory with your user name. Within this directory is a directory named private. Files that you put into that private directory you can edit, read, and write, and the professor can edit, read, and write, but no one else. To hand in your code and other materials, create a new directory, such as project1, and then copy your code into the project directory for that week. Please submit only code that you want to be graded.
When submitting your code, double check the following.
- Is your name at the top of each code file?
- Does every function have a comment or docstring specifying what it does?
- Is your handin project directory inside your Private folder on Courses?
Write Your Project Report
If you haven't already made a new page for this report on the wiki, then make one now (Log into the wiki, goto your Personal space by selecting "Personal Space" on the menu under the Person icon, then make the page using the "Create" button. Put the label cs151f19project10 in the label field on the bottom of the page. But give the page a meaningful title.
Your intended audience for your report is your peers not in the class. From week to week you can assume your audience has read your prior reports. Your goal should be to be able to use it to explain to friends what you accomplished in this project and to give them a sense of how you did it.
Your project report should contain the following elements.
-
A brief summary of the project, in your own words. This should be no more than a few sentences. Give the reader context and identify the key purpose of the assignment.
Writing an effective abstract is an important skill. Consider the following questions while writing it.
- Does it describe the CS concepts of the project (e.g. writing well-organized and efficient code)?
- Does it describe the specific project application?
- Does it describe your the solution or how it was developed (e.g. what code did you write/circuits did you build)?
- Does it describe the results or outputs (e.g. did your code work as expected)?
- Is it concise?
- Are all of the terms well-defined?
- Does it read logically and in the proper order?
- A description of your solution to the tasks, including images you created (including the required images or videos mentioned above). This should be a description of the form and functionality of your final code. Note any unique computational solutions you developed or any insights you gained from your code's output.
- A description of any extensions you undertook, including text output or images demonstrating those extensions. If you added any modules, functions, or other design components, note their structure and the algorithms you used.
- The answers to any follow-up questions (there will be 3-4 for each project).
- A brief description (1-3 sentences) of what you learned. Think about the answer to this question in terms of the stated purpose of the project. What are some specific things you had to learn or discover in order to complete the project?
- A list of people you worked with, including TAs and professors. Include in that list anyone whose code you may have seen, such as those of friends who have taken the course in a previous semester.
- Put the label cs151f19project10 on your wiki page.