CS 151 Fall 2021 Syllabus Labs/Projects
Project 5: Animated Scene
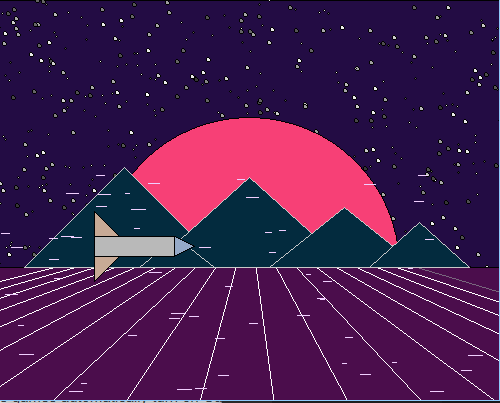
In this project, you will practice working with shape objects created from Zelle Graphics module. The result of this assignment will be an animated version of project 4 or a new scene inspired by the Animated Intro Credits for Film and Television. You will create a scene with several compound shapes, at least two of which that animates in some way (e.g. moves or changes color). Each of your compound shapes should be organized like the snowman from lab (init, animate, and test functions).
Extension points are awarded for creativity and added complexity, especially when it shows me that you can apply concepts from lecture and take things to the next level!
Tasks
0. Additional downloads (Optional)
You may use a modified version of the graphics module graphicsPlus.py in your project that adds two new methods to the shape objects:
getOutline: returns the current outline color of the shape.getFill: returns the current fill color of the shape.
It may be helpful to access these colors if you want to check the current color of an object and potentially change the color for a period of time before having it revert to its original color.
Use either graphics.py or graphicsPlus.py, but not both!
1. Design your scene and animation
Think about the animated scene you want to create inspired by Animated Intro Credits for Film and Television. You can use the scene that you created in project 4 with two new compound shapes or a new scene.
Choose at least two complex objects (from this week or last week) to animate. Animation can involve motion, changing color, or any other visible change you want to make.
Create a timeline for your scene that highlights important frames where things change. Think about how you will identify or define those moments in code.
Include some type of design document in your report showing your animation timeline.In your report section called Art Reflection discuss the animations that inspired you and what aspects you emulated.
2. Create two new compound shapes
Copy your compound_shapes.py file into this week's project folder. Create 2 new compound shapes.
Do the following for each compound shape that you create:
- Create an
initfunction with the parameters(x, y, scale)(e.g.snowman_init(x, y, scale)) for the snowman shape). Each one shares the same objective as the one from lab — to create all the shape objects that make up your compound shape and return them as a list. You may use the same process as usual for positioning and scaling your compound shape: hard-code values then convert those to offsets and scale the offsets and lengths. Use the same naming scheme as in lab, putting a_initat the end of the function name. - Create a
testfunction for your compound shape (e.g.snowman_test()in lab). Every test function should create the window/canvas/screen, create several versions of your compound shape (at different positions and scales), and draw them.
Include a picture for each compound object in your report (Required Images 3 and 4).
3. Animate two compound shapes
Choose two compound shapes to animate (from this week or last week). Add an animation loop to those compound shapes' _test functions.
For the two compound shapes you are animating, create an animate function with at least the parameters (shapes, frame, screen) (e.g. snowman_animate(shapes, frame, screen) from lab). Remember, this function should change the object for one frame only (i.e. it does not contain your animation loop). This change could involve moving the compound shape or changing one or more of the colors. You can give the animate function any number of other parameters necessary for it to work properly. For example, you may want to include the scale used to create the image, so that movement can scale with the size of the shape. Use the same naming scheme, putting a _animate at the end of the function name.
4. Place your compound shapes in your scene
Copy your scene.py file into this week's project folder or create a new scene2.py file.
Remember to import the appropriate modules (e.g. compound_shapes, time, whichever graphics module you are using, etc.).
Create a main function that should initialize (i.e. create) all the compound shapes in your scene and draw them. It should then contain the animation loop to animate the compound objects that change (i.e. the ones with animate functions).
If you have many versions of your compound shapes in your scene, it is probably a good idea to organize them in a list. The important thing is to make your code both succinct and readable.
5. Include a video of your animation in your report
I suggest using the screen recording feature of Quicktime on macOS or Xbox Game Bar on Windows 10. You can have it only record the portion of the screen where your scene is drawn. You can also edit the video to trim out the beginning and end of the recording, where you are starting/stoping the animation.
Creating a video also is a nice way to show your family and friends what you've been working on! Don't spend too much time on getting the video recording to work; an acceptable alternative is to include a few screenshots of your animation in your report.
If you have trouble including the video in your Google Doc report, no problem, just include it in your project folder.
Check reproducibility
In order to grade your project, we need to be able to run your code and get the same results as you do! Here is a summary of the expected outputs from each of the source code files that you created:
python3 lab5_collage_animation.py: Shows an animated collage of 3 Zelle shape objects whose colors change randomly over time.python3 lab5_snowman.py: Shows animation of snowman walking up or down the screen, while shuffling side-to-side.python3 scene.pyorpython3 scene2.py: Draws and animates your scene.
Extensions
Congratulations on completing the core tasks! If your code and report meet the above expectations, you’ve already earned up to 26/30 points for this project.
The remaining 4/30 are a chance for you to earn credit for exploring parts of this project and digging deeper to express your creativity! This is entirely optional; 26/30 is a B and is a perfectly respectable place to stop. Extensions are open-ended and exist to compliment the structured core project. Explore and learn something new that interests you! Concentrating your energy on 1-2 "deep" extensions that challenge you will earn you more points than many small, "shallow" extensions.
You can pick your own topics that interest you. Here are a few examples:
- Make additional compound objects beyond the required two, or animate more objects than the required two.
- Set up a system that creates a scene out of compound objects based on a list that gives the name, location, and scale of each compound object in the scene.
- Make an animation with multiple sequential events that make a coherent story.
- Make the trailer for your favorite action movie.
- Shape and scene complexity beyond the core requirements.
Submission checklist
To turn in your project, make sure you do all of the following:
- Check the rubric in Google Classroom and make sure your report and code contain all the required parts.
- Move your lab folder inside your project folder (i.e. drag the
Lab05folder insideProject05). - Create a zip file of your project.
- Attach (drag) the zip file to the posted project assignment on Google Classroom.
- Click Turn In on your Google Doc report on Google Classroom.