CS 353 Fall 2021     Syllabus       Labs/Projects

Lab Goals Part 1: Design Circuit Part 2: Bluetooth Part 3: Accelerometer + Compass Part 4: Button Check-in

Lab 4: Bluetooth Accelerometer

Goals

  • Design a circuit based on component specifications.
  • Wire components based on self-drafted circuit design.
  • Have a micro-controller register as a keyboard and use it to send data from the micro-controller to another computer.

Part 1: Design Circuit

Design Your Circuit

ble
Draw a circuit diagram representing your bluetooth module, accelerometer+compass and button wired to the board.

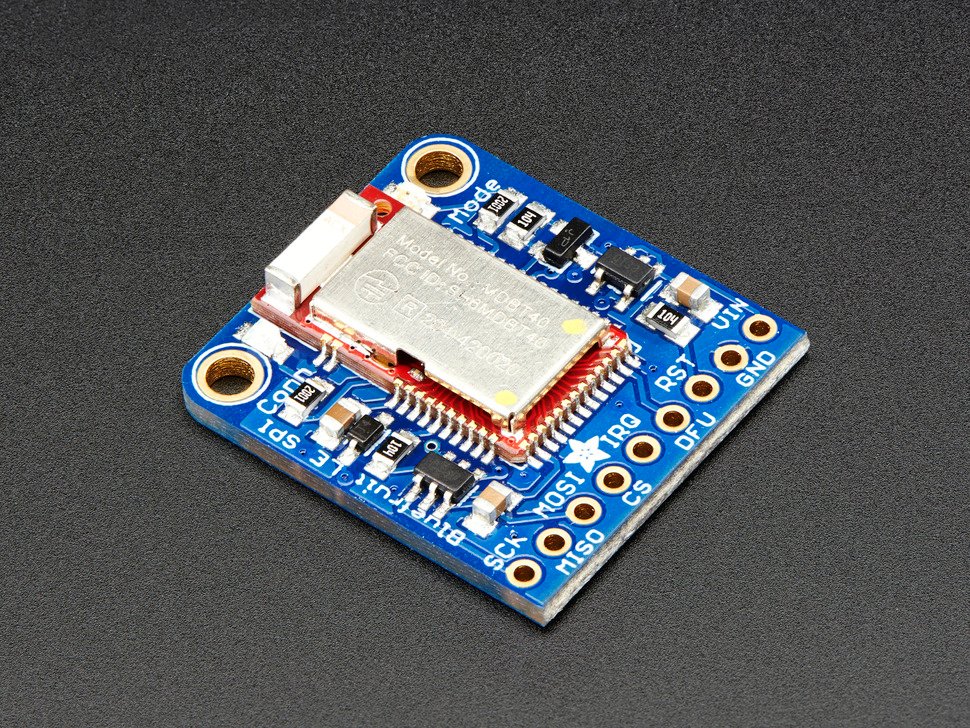
Bluetooth

Bluefruit SPI Breakout Board
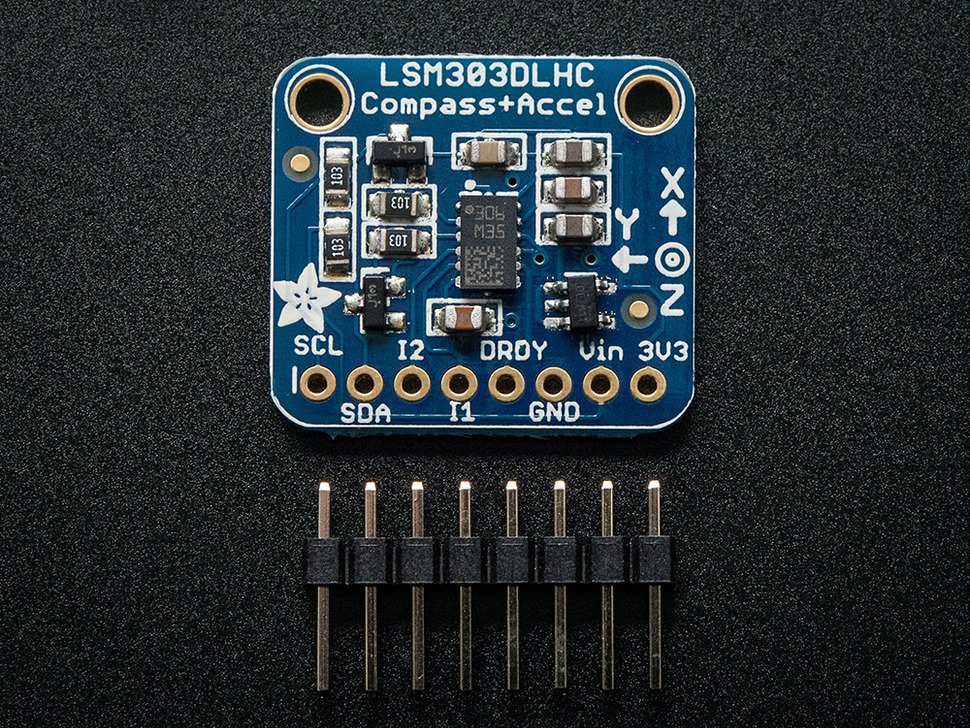
LSM

Accelerometer + Magnetometer

Triple-axis Accelerometer+Magnetometer LSM303DLHC
LSM

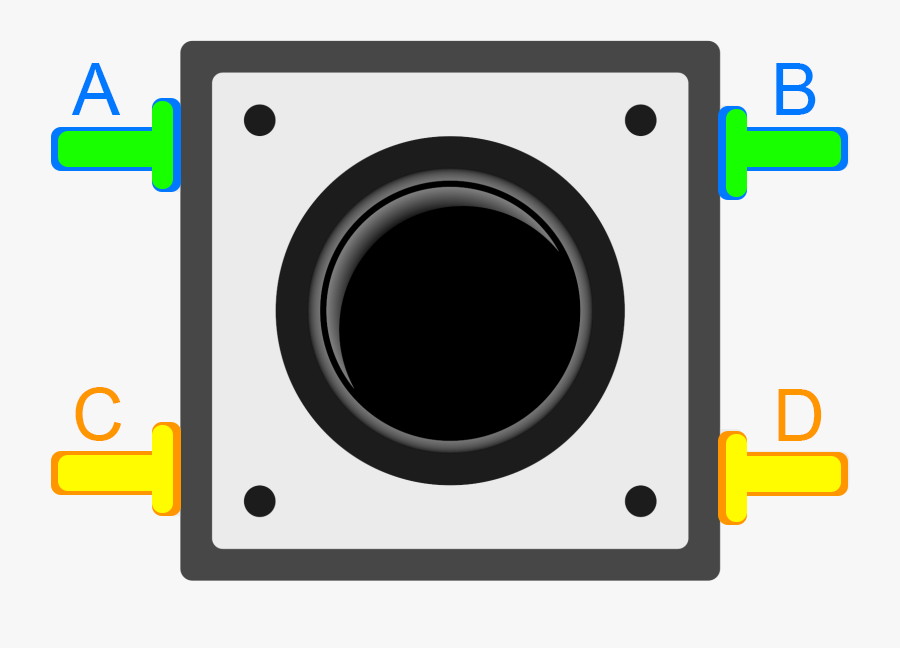
Button

Part 2: Bluetooth Breakout Board

Wire the Bluetooth Breakout Board

According to your circuit diagram, wire the bluetooth breakout board.
ble

Install the Bluetooth Library

The lab computers already have the required bluetooth library. If you plan to be only using the lab computers for programming your microcontroller you can skip this step.

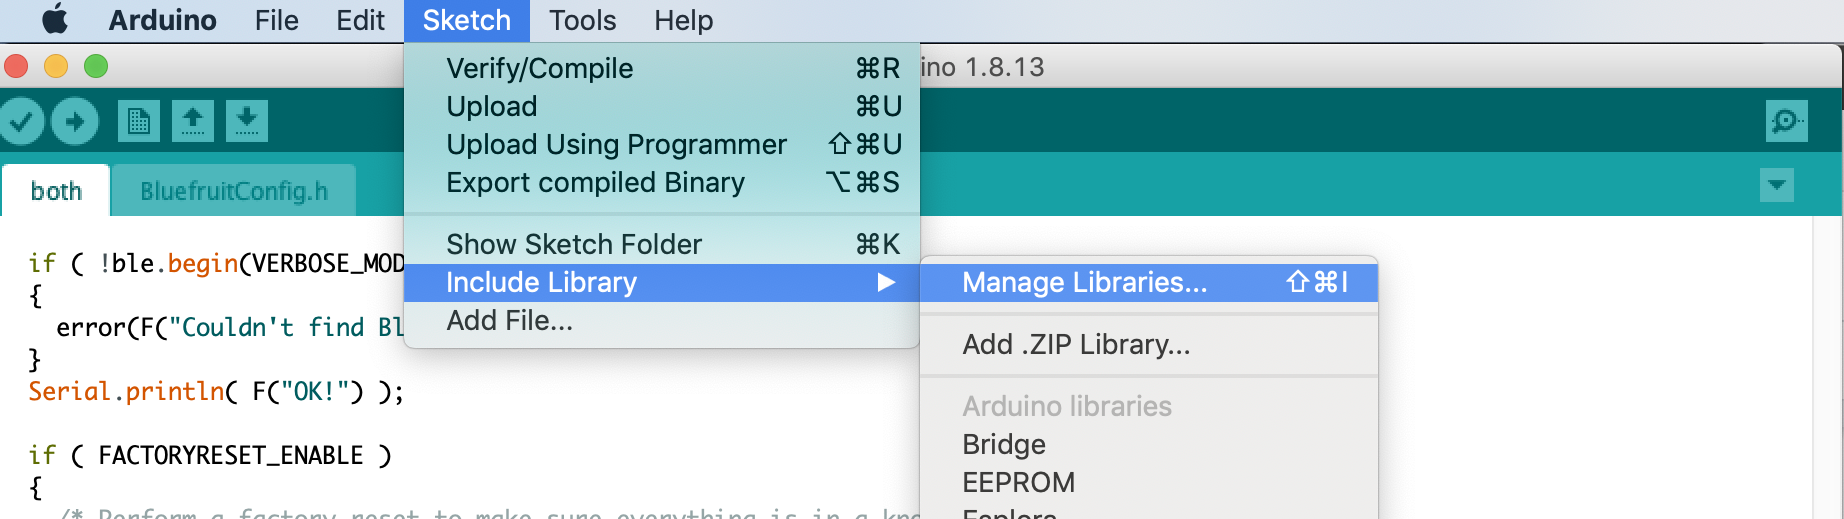
To start, load the Arduino IDE. Then use the menus at the top to select Sketch -> Include Library -> Manage Libraries...

Use the searchbar to find the library Adafruit BluefruitLE nRF51.

Click Install.
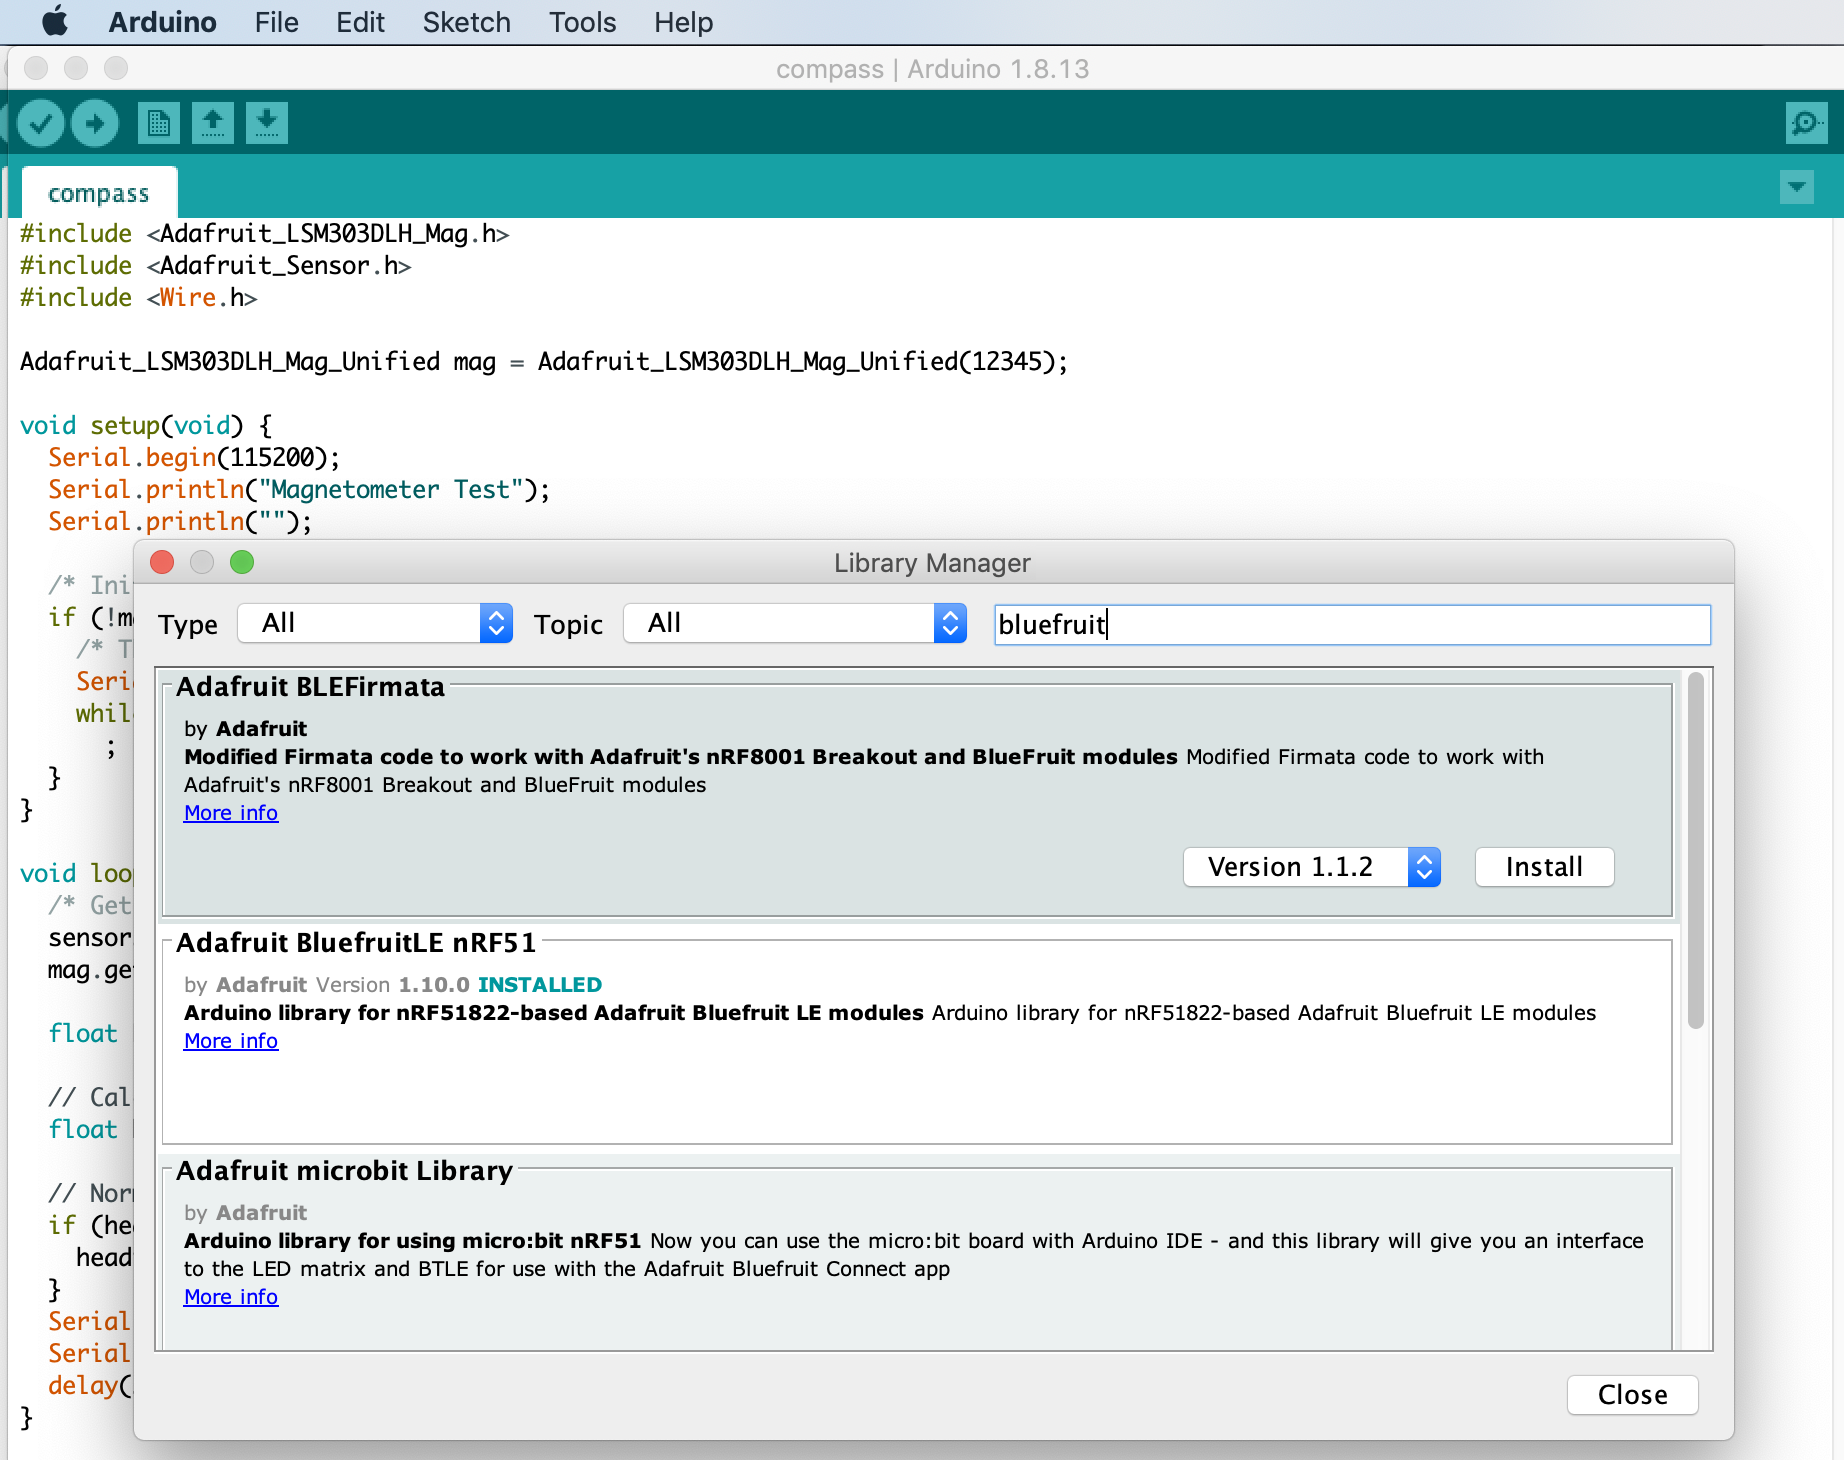
ble

Test the Keyboard Demo

  • On the computer connected to the micro-controller (computer 1) open the hidkeyboard demo (Use the menus at the top to select File -> Examples -> Adafruit BluefruitLE nRF51) and save it as a new project colbyid_Lab4
  • Modify the name of the keyboard from Bluefruit Keyboard to colbyid_microcontroller (replacing colbyid with your colbyid) on the line ble.sendCommandCheckOK(F( "AT+GAPDEVNAME=... and save.
  • Open Serial Monitor on computer 1 and change the baud rate to 115200
  • On a different computer or phone with bluetooth enabled (computer 2), connect to colbyid_microcontroller as a bluetooth keyboard and open a text editor and put your cursor inside of the text editor.
  • On computer 1, type something into the serial monitor and click send. Your text should appear in the text editor on the computer 2.
  • More information for specific devices.

Part 3: Accelerometer + Magnetometer Breakout Board

ble

Wire the Accelerometer + Magnetometer Breakout Board

Review the information on how to setup and test your breakout board.

According to your circuit diagram, wire the Accelerometer + Magnetometer breakout board.
ble

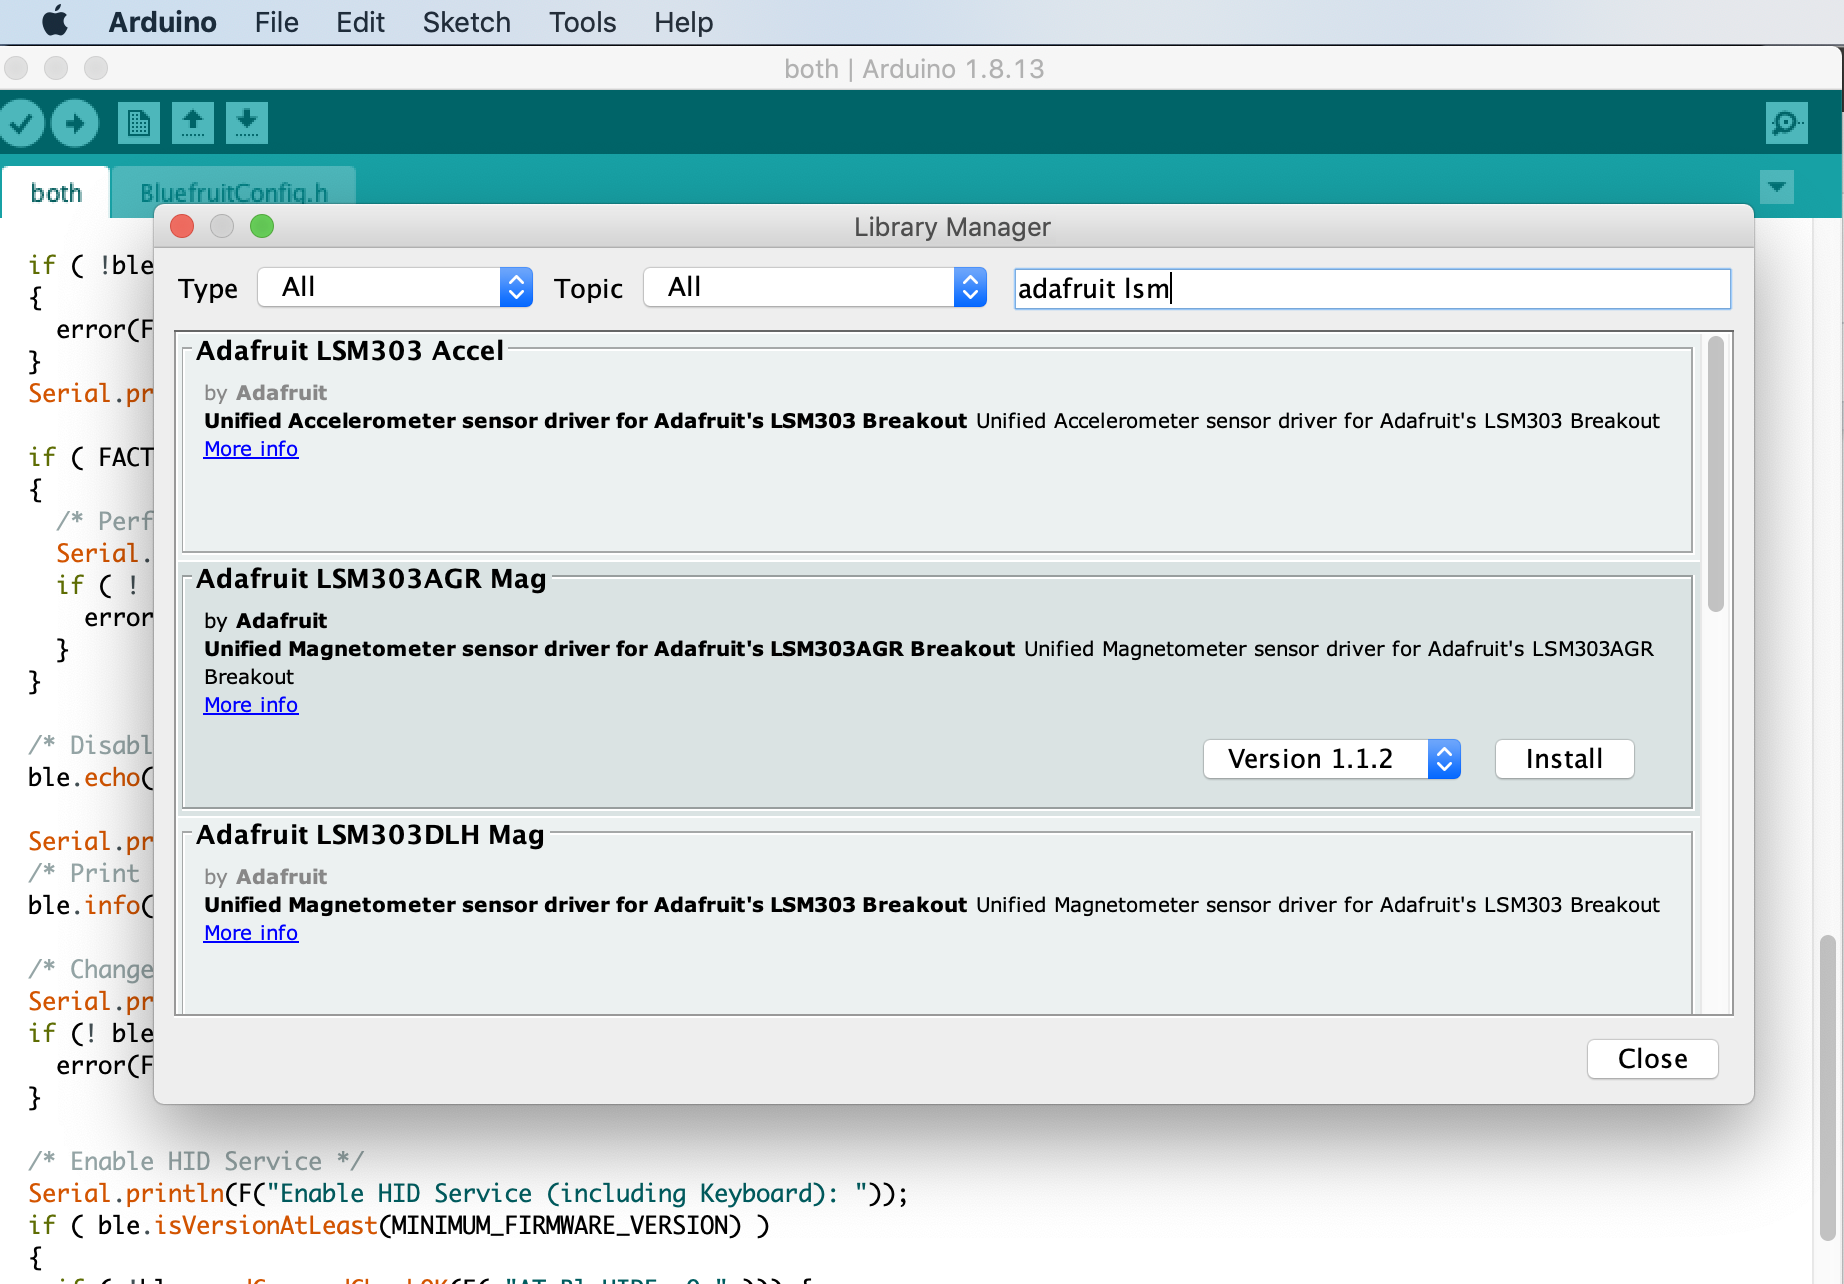
Install the LSM303 Libraries

Use the menus at the top to select Sketch -> Include Library -> Manage Libraries...

Use the searchbar to find "Adafruit LSM303 Accel" and "Adafruit LSM303DLH Mag" libraries. Install them both.

When installing "Adafruit LSM303 Accel" a popup will ask if you would like to install dependencies. Click "Install all".

Test the Accelerometer and Compass Demos

  • Open the accelsensor demo (Use the menus at the top to select File -> Examples -> Adafruit LSM303 Accel) review the code and run it. Make sure your micro-controller can read accelerometer data.
  • Open the compass demo (Use the menus at the top to select File -> Examples -> Adafruit LSM303DLH Mag) review the code and run it. Make sure your micro-controller can read magnetometer data.

Part 4: Button and Programming

Wire your button according to your circuit diagram.

Create an interrupt to toggle a boolean "on" and "off" when this button is pressed.

Create a program that is registered like a bluetooth keyboard. When the button is pressed, the keyboard prints compass and accelerometer data to the Adafruit_BluefruitLE_SPI object once every 3 seconds. When the button is pressed again the arduino stops writing to the Adafruit_BluefruitLE_SPI.

Check-in

Check-in

The goal is for you to have the bluetooth and accelerometer working by the check-in. It's okay if you don't, just submit a check-in (video&doc) of what you have done so far and you'll receive 75% on the check-in (-5% of your project grade). You can only turn in extensions if your check-in is ontime and complete.

Submit a video and Check-in document on Google Classroom

Upload a 0.5-2 minute Documentation Video with narration.
  • Show that you can connect to the micro-controller as if it is a bluetooth keyboard.
  • Show that when you press the button the micro-controller begins typing accelerometer data.
  • Show that the accelerometer and compass data change as expected.
  • Show that when you press the button again the micro-controller stops typing.
  • Describe what is happening.
Attach a Google Doc Check-in which includes:
  • Documentation of the circuit:
    • Drawing of the circuit you designed.
    • Clear photo of the circuit in which the wiring is clearly visible, wired correctly.
  • Video Description Paragraph:
    • 5-10 sentences describing what is happening in the video.
      • If complete: How does it work?
      • If incomplete: What is the current issue? Where are you stuck?
  • Project Idea:
    • 5-10 sentences describing an idea for a project that incorporates the bluetooth or accelerometer with the microphone, piezo element, IR sensor and/or the vibrating motor. (Button, potentiometer, and red LED are optional).
      • What is it?
      • What materials would you need?
      • How would you implement it?