CS 151 Fall 2021 Syllabus Labs/Projects
Lab 4: Shape Objects
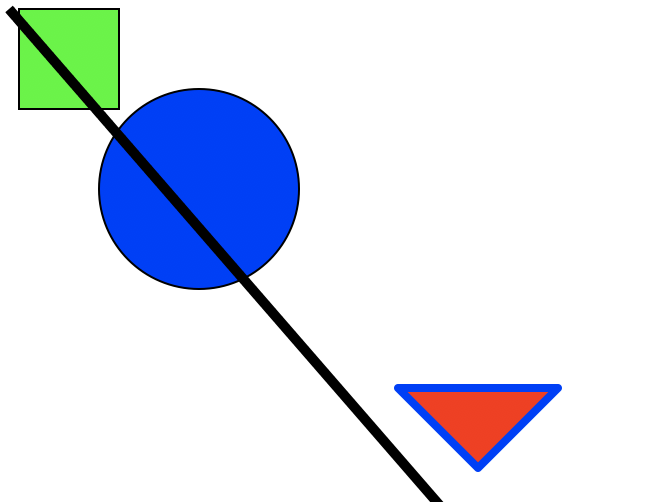
In this week's lab, you will explore the Zelle Graphics module, a different approach to drawing shapes on the digital canvas. Unlike turtle where you draw "pen strokes", with the Zelle module you create shapes. Each shape is an object, which offers you more control.
The goals this week are to:
- Practice working with objects.
- Learn to use new types of objects outside of the
turtlemodule. - Use lists to organize collections of related objects.
- Practice reading code documentation to discover what you can do with Zelle Graphics objects.
Tasks
L0. The setup
Create a Lab04 folder on your computer where you store CS151 projects and labs, hopefully somewhere that is backed up (e.g. in Dropbox, Google Drive, Microsoft One Drive, etc.)
Open VS Code. Create a new Python source code file called lab4_collage.py.
Open up a Terminal (e.g. Control+` in VS Code) and change the directory (cd) to the Lab04 folder.
L1. Downloads
Download each of the following files to your Lab04 folder (right-click the links and choose "Save As").
| File type | Links |
|---|---|
| Zelle Graphics Module | Zelle Graphics module Documentation (PDF) |
| Example code | lab4_zelle_demo.py lab4_break.py lab4_loops.py |
Important: The Zelle Graphics documentation PDF contains a listing of all Zelle Graphics object types, their methods, and how they work. It is helpful to have this open as you work.
L2. Make a collage of three different customized shapes in lab4_collage.py
Write all your code in a main function. Call your main in the usual if __name__ == '__main__': statement.
Some notes:
- You should use the code examples (download in Task L1) to help you get started.
- Each of your shapes should be different. For example, they should not be all rectangles.
- Each shape should have a unique:
- fill color
- outline width
- outline color
- position
Running python3 lab4_collage.py should show your collage and keep it up until the user clicks.
Hint: Don't know which method to use to customize each shape? Open up the Zelle documentation PDF! Methods to customize any shape can be found at the beginning of Section 3.
L2a: Making your drawing code more efficient
Rather than calling the draw method on each individual shape on a separate line of code, take a moment to make your code more efficient using a combination of lists and loops: loop through the list to call the draw method on each individual shape.
Here are the steps:
- Comment out your code in
mainwhere you calldrawon each shape. - Add your shapes to a list in your
mainfunction. - In
main, loop through your list of shapes and draw them on your ZelleGraphWinobject (the "screen"). Your loop should only have one line of code in it.
Running python3 lab4_collage.py should show you the same collage as before, just created more efficiently.
Hint: Check out the above example code for a convenient way to loop through your shapes.
Take a screenshot of your collage. This is Required Image 1 to be included in your project report.
L3: Snowman
In this final task, you will create a complex shape using the same process as you have been practicing, except we will organize your code in three separate functions:
- The init function will take care of creating your shapes and adding them into a list.
- The test function will call your init function then draw the shapes.
You will create a simple snowman composed of three stacked circles and two smaller ones for eyes.
The organization follows what you will be expected to do in the project.
L3a: Create the snowman shape (snowman_init)
In lab4_snowman.py copy-and-paste in the following function signature and docstring:
def snowman_init(x, y, scale):
    '''Creates and returns a list of Zelle Graphics objects to make up a snowman.
    Minimally, this is just three equal sized circles stack on top of each other
    with two smaller circles for the eyes

    Parameters:
    -----------
    x: int. x coordinate for the top circle center.
    y: int. y coordinate for the top circle center.
    scale: float. Scaled size of the snowman.

    Returns:
    -----------
    list with 5 Zelle Circle objects in it.
    '''
The job of this init function is to create all the objects that make up the complex shape (a snowman) and place them in a list. Here are the positions of the snowman body circles (each has radius 30; radius = 30):
(x, y)(x, y+2*radius*scale)(x, y+4*radius*scale)
and eye circles (each has radius 3; eyeRadius = 3):
(x-scale*radius/2, y)(x+scale*radius/2, y)
It is not a typo that radius appears in the above eye circle positions.
Hint: Remember that the positions of Circle objects need to be specified as gr.Point objects.
L3b: Test the snowman (snowman_test)
Test out your snowman complex shape by creating a test function that draws it to the screen. Copy-and-paste in the following function signature and docstring:
def snowman_test():
    '''Main function that creates the screen, creates the snowman, draws it to the screen.
    '''
Write code that does what the docstring instructs. Here are some guidelines:
- Remember to create the
GraphWinobject! - You can position the snowman anywhere you like (e.g. center of the canvas).
- Remember to use loops to call a function to every shape in a list.
- You should mainly be calling functions that you've already written.
Add if __name__ == "__main__": and call snowman_test in it. Running lab4_snowman.py should show you a snowman that looks like this:
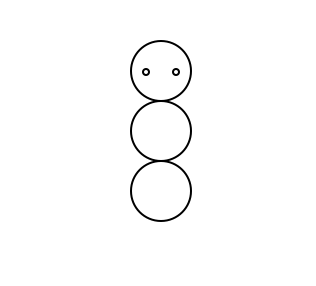
Run your code, and take a screenshot of your snowman. This is Required Image 2 to be included in your project report.
Get started with the project
Once you are done with each of the lab tasks, you may start on the project.